
Set up Ember
Goal: open a signed-in terminal workspace, choose where jobs run, and configure an extraction endpoint. Setup takes you from signing in to choosing the model that will answer your questions.
Choose the setup that fits you
| Your situation | Choose | What to have ready |
|---|---|---|
| Your institution already runs Ember | existing | API address and account; ask which model endpoints are available |
| You want Ember's backend on this machine | local-source | Running Docker, a first-admin account to create, and your model endpoint details |
Both routes use the same CLI. You do not need to host a model locally: the workers can call a permitted remote endpoint.
Know which connection is which
- Ember API: where you sign in and where cohorts, prompts, and jobs are managed.
- Model endpoint: where prompts and document content are sent for inference. Configure its model name and optional API key separately.
- Fetching connection: how protected document URLs are downloaded. Skip it for the first inline-text example.
This guide gets the workspace ready. The next guide walks through importing documents, confirming extraction, and checking the resulting files.
1. Prepare your machine
Install Python 3.11+, Git, and uv. For a local backend, also install and start Docker with Compose. Have your approved model-server URL, model name, and optional API key ready. An existing institutional Ember API does not require local Docker.
2. Install from the repository
Run these commands in your operating system terminal:
git clone https://github.com/BitsandFlames/Ember-CLI.git
cd Ember-CLI
uv sync --all-packages --extra dev
uv run ember
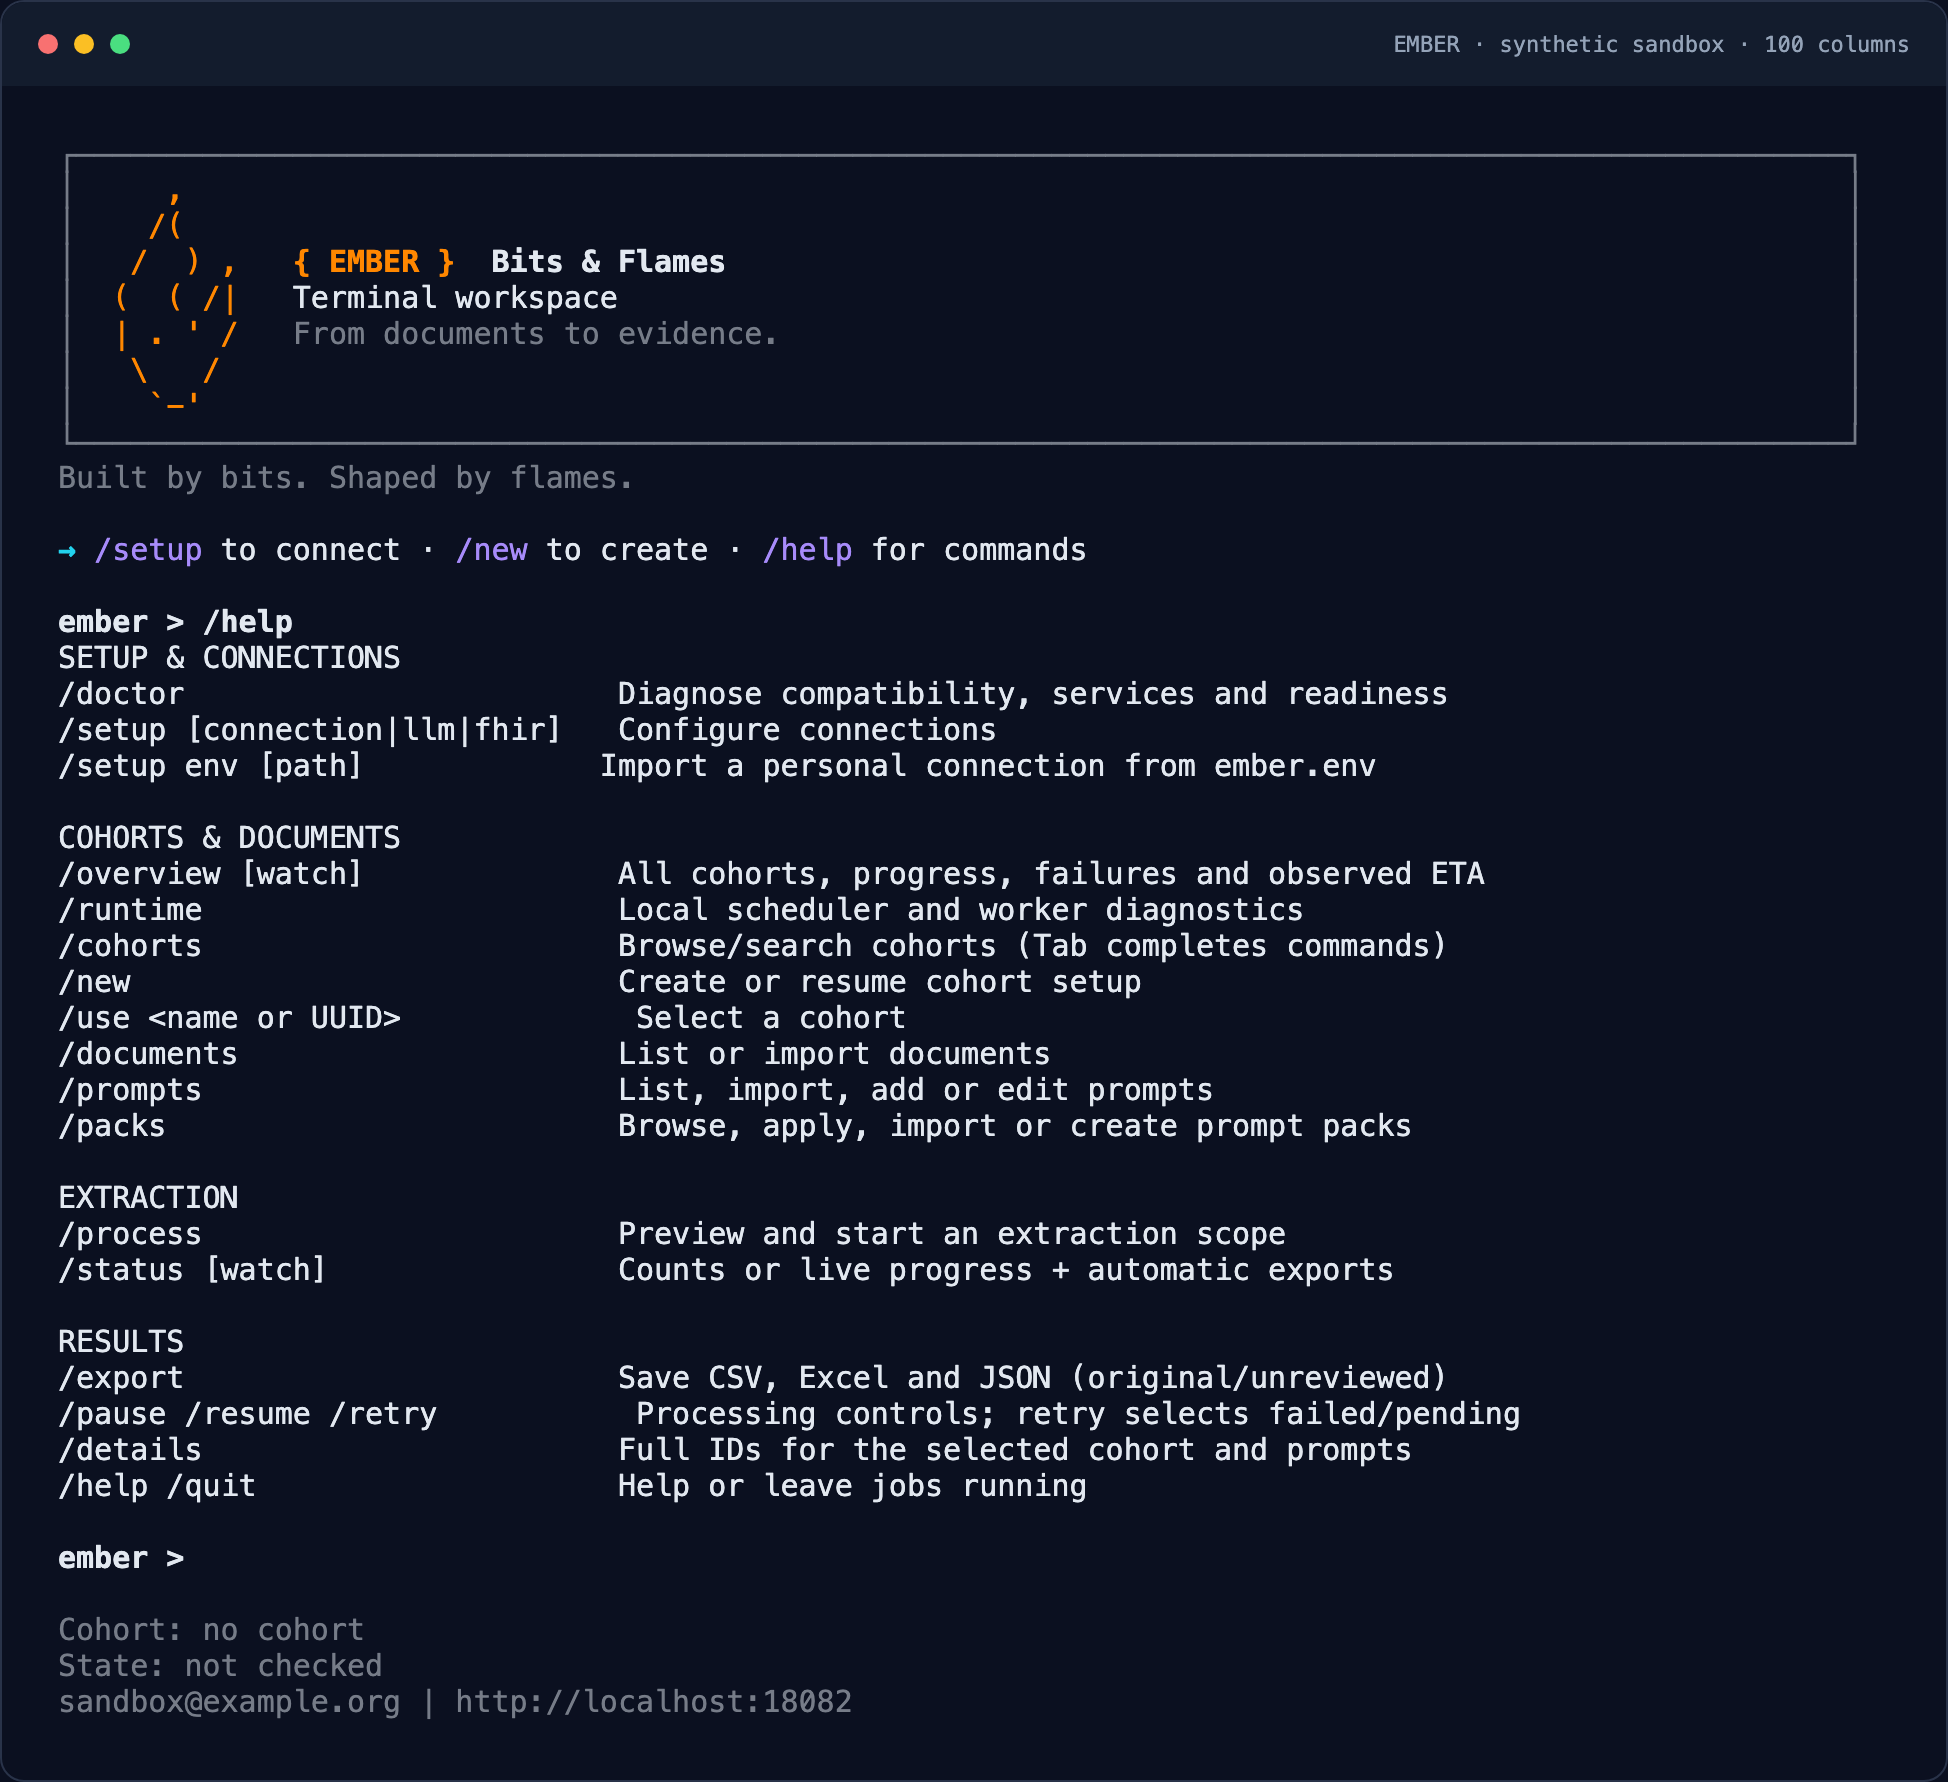
You should see: the Ember header and command prompt. Commands beginning with / below belong inside this workspace, not your shell.
3. Choose where Ember runs
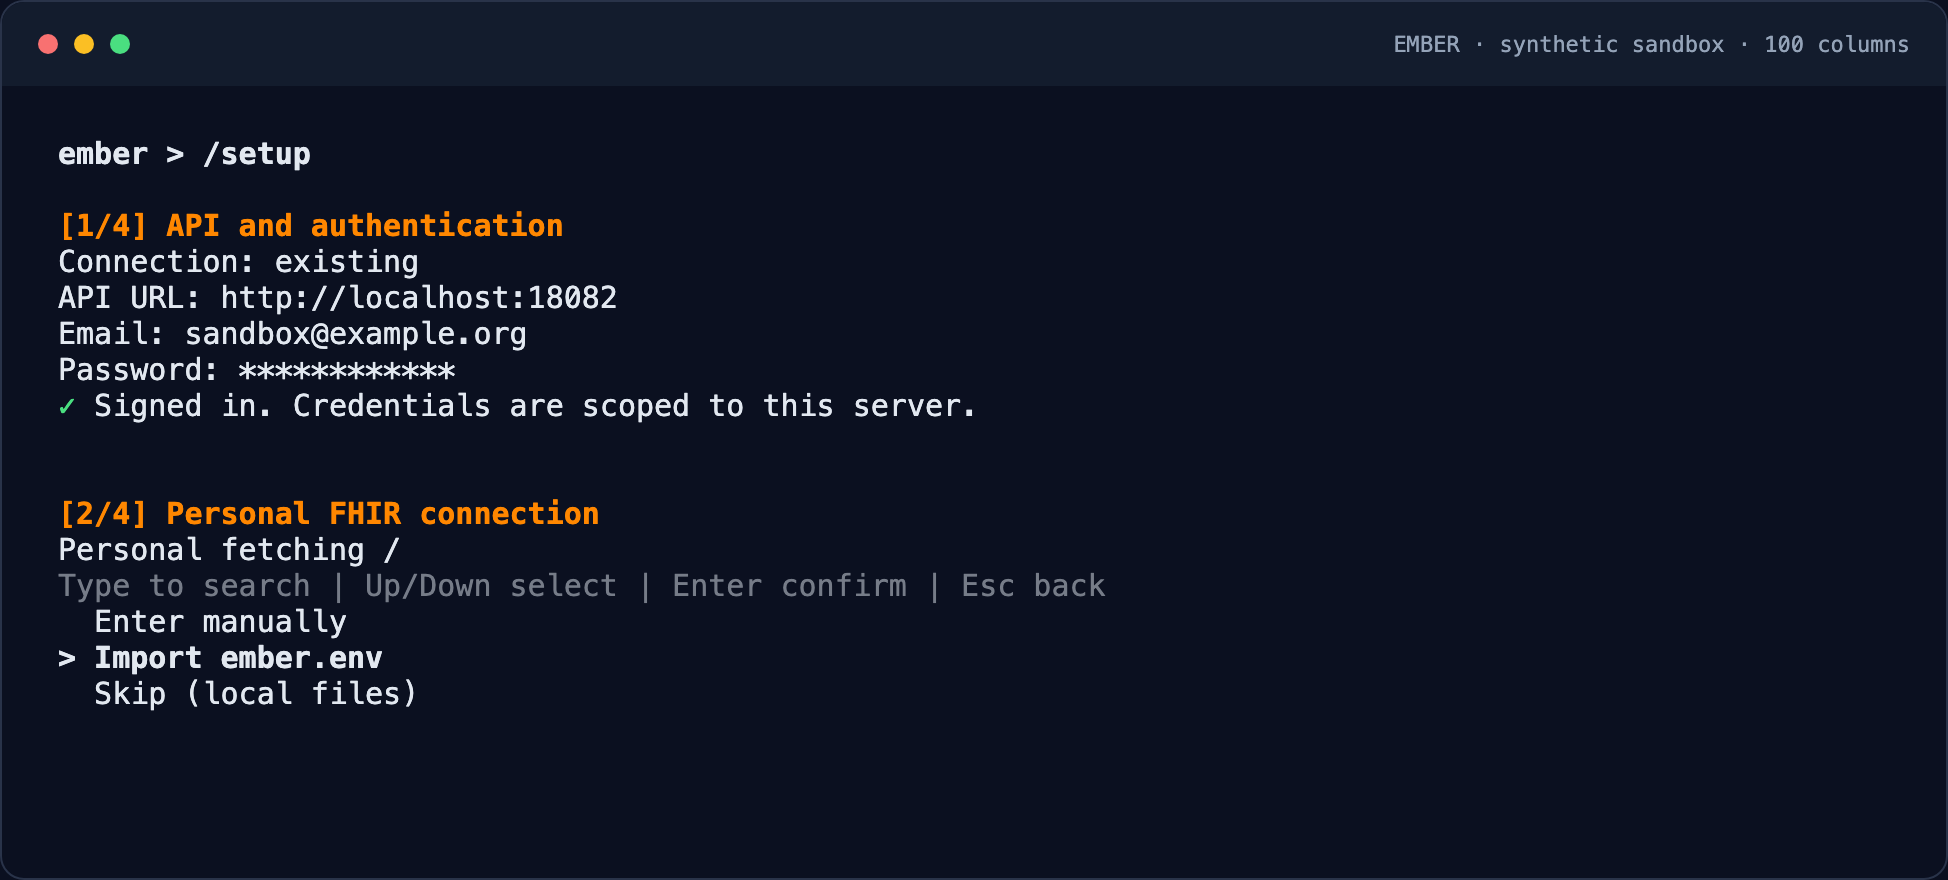
Inside Ember, enter:
/setup| Choice | What to do | Where jobs run |
|---|---|---|
| local-source | Choose this for a source checkout; allow Docker to build the backend | On this machine |
| existing | Enter your institution's approved Ember API address | At that API deployment |
| local | Use only with a released wheel containing a published backend image digest | On this machine |
Current development wheels do not contain a published image digest. Use local-source instead of repeatedly retrying image installation.
4. Sign in and configure connections
For a new local stack, setup asks you to create the first administrator account. There are no default production credentials. For an existing API, use your account on that server.
- Fetching: skip this for inline text or local files. For protected URLs, follow FHIR and document-server setup.
- Inference: an administrator uses
/setup llmto save a model endpoint. Follow LiteLLM and vLLM setup. Other users select an available endpoint for their prompts. - Readiness: run
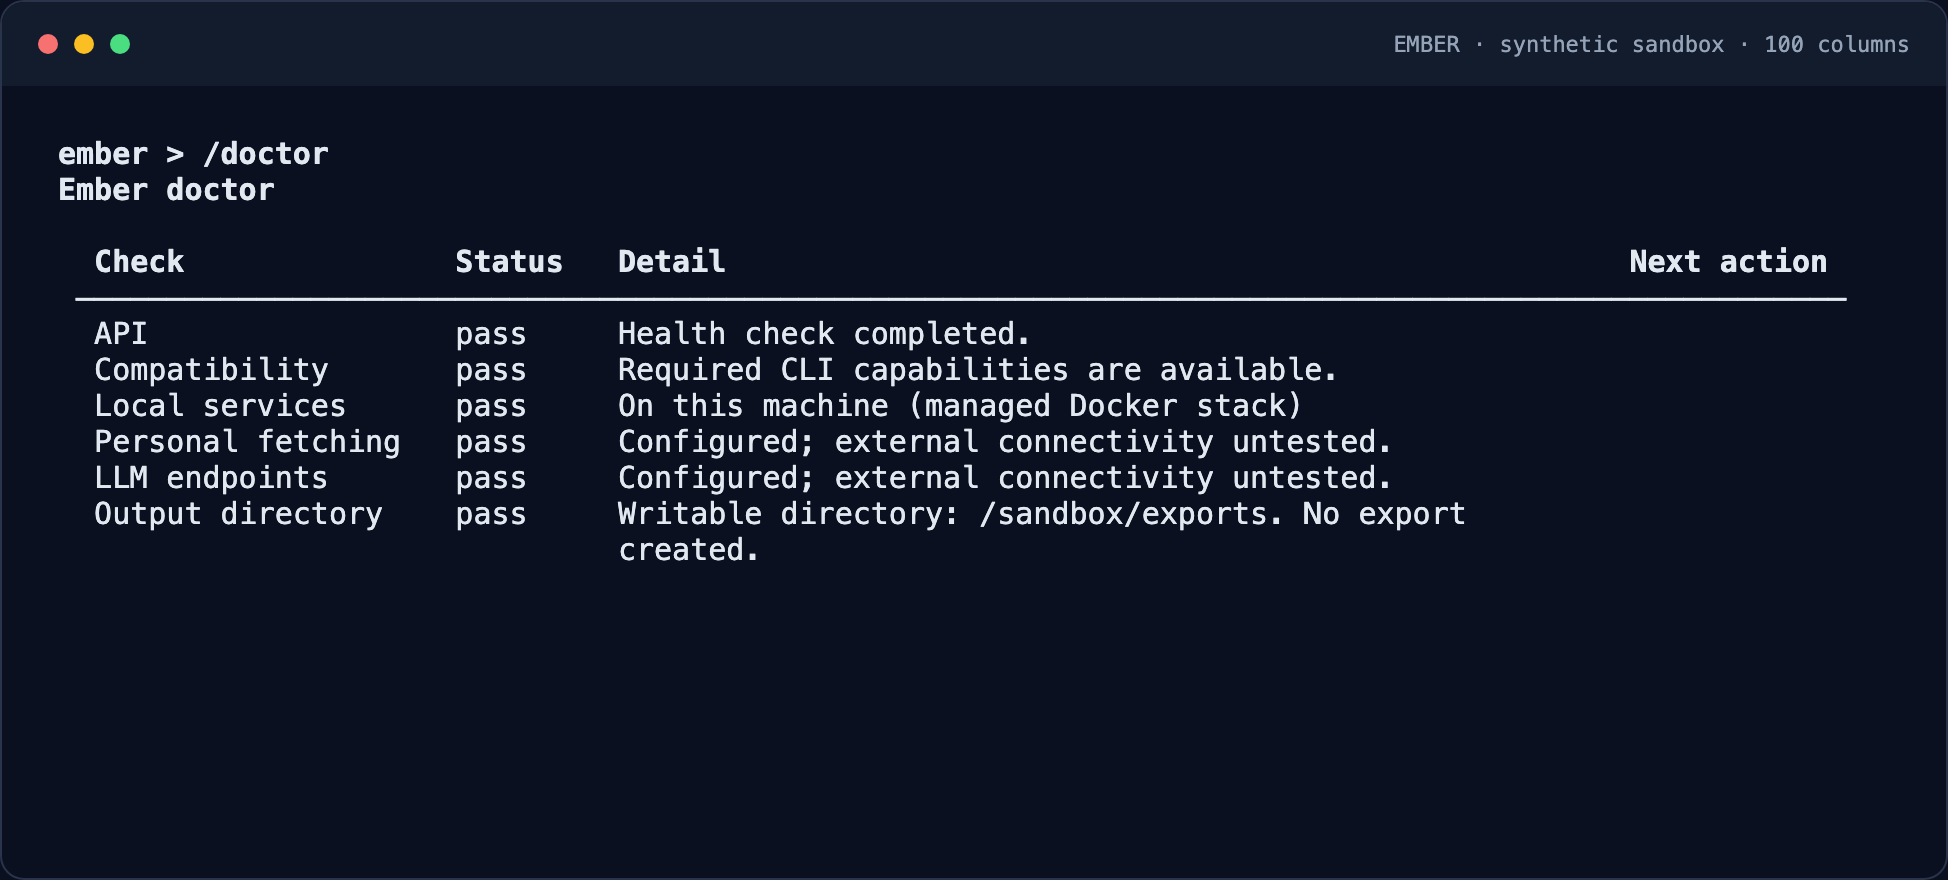
/doctor. Configuration readiness does not mean a real external document or model call has succeeded.
5. Check that you are ready
- You can sign in to the intended Ember API.
- You can select a configured model endpoint; your API/workers can reach it.
- You have the fictional example files from the repository.
- You have a writable local output directory.
A successful /doctor configuration check is useful, but does not prove external access or model inference. The fictional first run is your end-to-end check.
6. Start your first cohort
Continue with the fictional first-cohort walkthrough. You are ready when you can sign in, see an available model endpoint, and choose a writable output directory.
If setup stops
- Docker unavailable: start Docker, then retry the connection setup.
- Sign-in fails: confirm you are using the intended API and account.
- Model inaccessible: check the address from the API/worker environment, not just from your laptop.
- Cancelled a step: rerun
/setup; non-secret drafts are retained where supported. Enter secrets again when requested.
Use arrow keys and Enter to select, Tab for command completion, and Escape to leave selectors. Plain terminals offer numbered choices.